In this article, we will focus on setting up Enhanced Conversions in WordPress, using Forminator and Google Tag Manager.
We’ve discussed about why Enhanced Conversions are a must-have for Google Ads, and we went over the simplest way to set them up, through CSS Selectors.
However, even though the CSS Selectors method is generic and pretty straightforward, it may not work for all forms. If you can’t validate the form, you need to look at other ways, such as setting up Enhanced Conversions through Google Tag Manager’s Data Layer.
I won’t go through what the Data Layer is, but you should know that it’s it is the fastest way to level up your data collection across web properties. If you want to learn more about it, I strongly suggest you head over to Analytics Mania. Their Tag Manager tutorial is also amazing and highly recommended.
Prerequisites
- WordPress
- Forminator
- Tag Manager
- Forminator Conversion Tracking through Tag Manager
In my opinion, Forminator is one of the best Contact Form plugins out there. The free version is arguably one of the best of any free plugins.
We recommend Forminator as a replacement for Hubspot’s Free Tier Forms, as the Hubspot Integration is free, it can help you get rid of the branding message, and can also set up Enhanced Conversions without paying for Marketing Hub Pro.
Make Forminator push more data to the Data Layer
There is, however, a problem. By default, Forminator doesn’t push too much data to the Data Layer. I don’t know why they haven’t fixed this yet, as other plugins do push more data, but it’s something we’ll have to take care of.
Luckily, this issue was raised in their support forums, and the solution is also in there. We just have to add a piece of code to WordPress.
For this, you can use any plugin that allows you to add code snippets to WordPress. We’ll use WPCode. Here’s what you need to do:
- Add WPCode to your WordPress site.
2. Create a new code snippet in WPCode and add the following code:
(function() {
function formDataToObject(formData) {
const object = {};
formData.forEach((value, key) => object[key] = value);
return object;
}
jQuery(document).on('forminator:form:submit:success', function(e, formData) {
const formDataObject = formDataToObject(formData);
window.dataLayer = window.dataLayer || [];
dataLayer.push({
event: 'forminator_form_submit',
form_id: formDataObject.form_id,
inputs: formDataObject
});
});
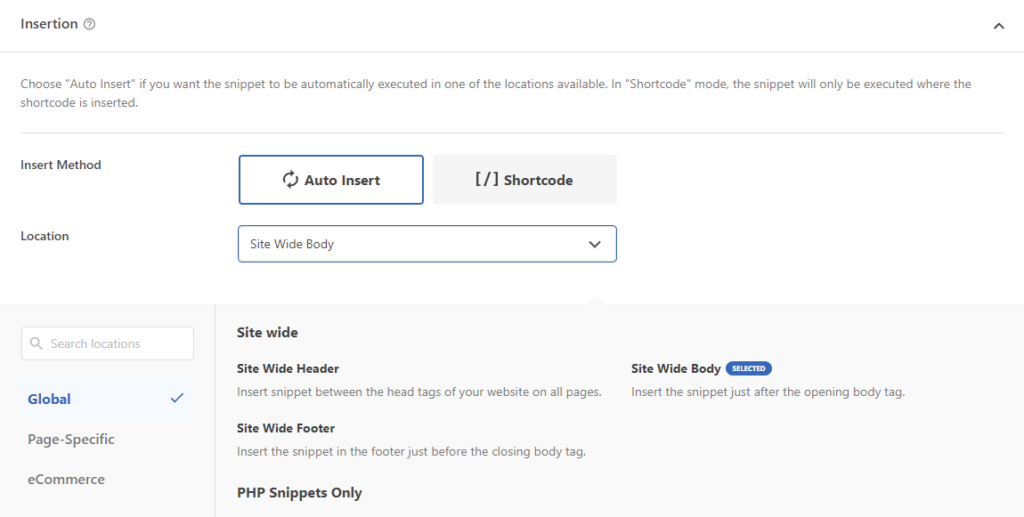
})();3. Under Insertion, make sure the code is inserted under the site-wide body.
Setting up Enhanced Conversions
This next part focuses only on setting up Enhanced Conversions. If you don’t have Forminator Conversion Tracking set up through Tag Manager, make sure you do that before.
- Go to Tag Manager, find, and Click on the Google Ads Conversion Tag
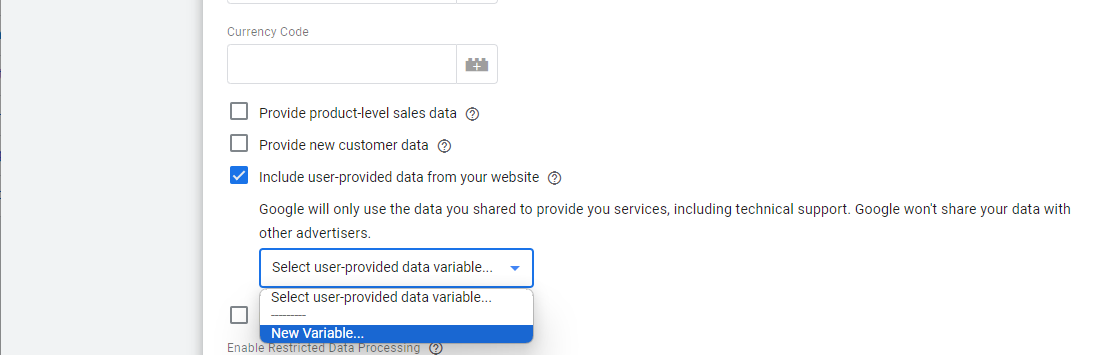
- Click to edit the Tag Configuration and scroll down to “Include user-provided data from your website”
%22%20transform%3D%22translate(1.8%201.8)%20scale(3.51563)%22%20fill-opacity%3D%22.5%22%3E%3Cellipse%20fill%3D%22%23cacaca%22%20cx%3D%2274%22%20cy%3D%2281%22%20rx%3D%2254%22%20ry%3D%2254%22%2F%3E%3Cellipse%20fill%3D%22%23fff%22%20rx%3D%221%22%20ry%3D%221%22%20transform%3D%22matrix(41.82547%20-56.52388%20179.33582%20132.70153%20168.8%200)%22%2F%3E%3Cellipse%20fill%3D%22%23fff%22%20cx%3D%2266%22%20cy%3D%223%22%20rx%3D%22255%22%20ry%3D%2227%22%2F%3E%3Cpath%20fill%3D%22%23fff%22%20d%3D%22M9-10l42.5%2029.7L5.1%2086.1l-42.6-29.8z%22%2F%3E%3C%2Fg%3E%3C%2Fsvg%3E)
- Check that, and select New Variable
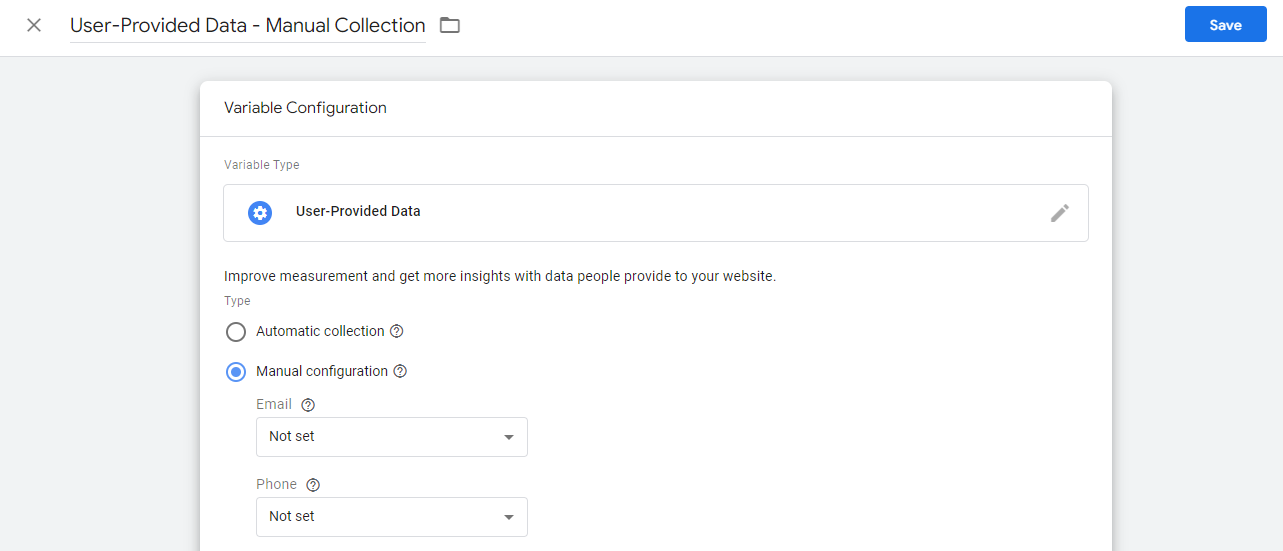
- Give the variable a name, like “User-Provided Data – Manual Collection”
- Select Manual Configuration
%22%20transform%3D%22translate(1.8%201.8)%20scale(3.51563)%22%20fill-opacity%3D%22.5%22%3E%3Cellipse%20fill%3D%22%23c7c7c7%22%20rx%3D%221%22%20ry%3D%221%22%20transform%3D%22matrix(13.4295%2019.86143%20-17.76734%2012.01356%20247.3%2011.7)%22%2F%3E%3Cellipse%20fill%3D%22%23fff%22%20rx%3D%221%22%20ry%3D%221%22%20transform%3D%22rotate(-23.1%20284.1%20-222.7)%20scale(140.80399%20149.23654)%22%2F%3E%3Cellipse%20fill%3D%22%23fff%22%20cx%3D%2291%22%20cy%3D%22109%22%20rx%3D%22164%22%20ry%3D%22164%22%2F%3E%3Cpath%20fill%3D%22%23dedede%22%20d%3D%22M236%200h20v34h-20z%22%2F%3E%3C%2Fg%3E%3C%2Fsvg%3E)
- Click on the Email field, scroll down and select New Variable
- Name the new variable something like “DLV – EC – Email”
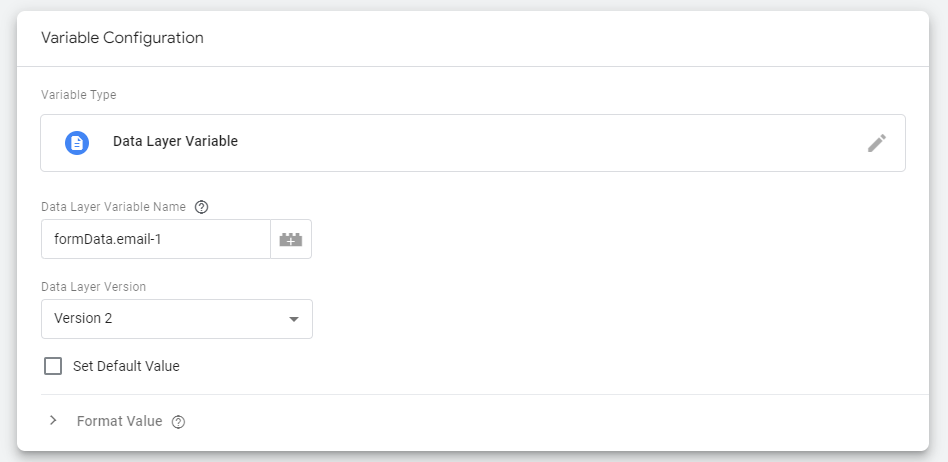
- Click on Variable Configuration, and select Data Layer Variable
- Under Data Layer Variable Name add formData.email-1
%27%20fill-opacity%3D%27.5%27%3E%3Cpath%20d%3D%22M188%20135.4h17.7v87.8H188zm696.2-102h17.6v52.7h-17.6zM1.8%2072h42.1v24.7H1.8zm597.6%20154.8l35.2-56.3-88%203.5z%22%20fill%3D%22%23fff%22%20fill-opacity%3D%22.5%22%2F%3E%3C%2Fg%3E%3C%2Fsvg%3E)
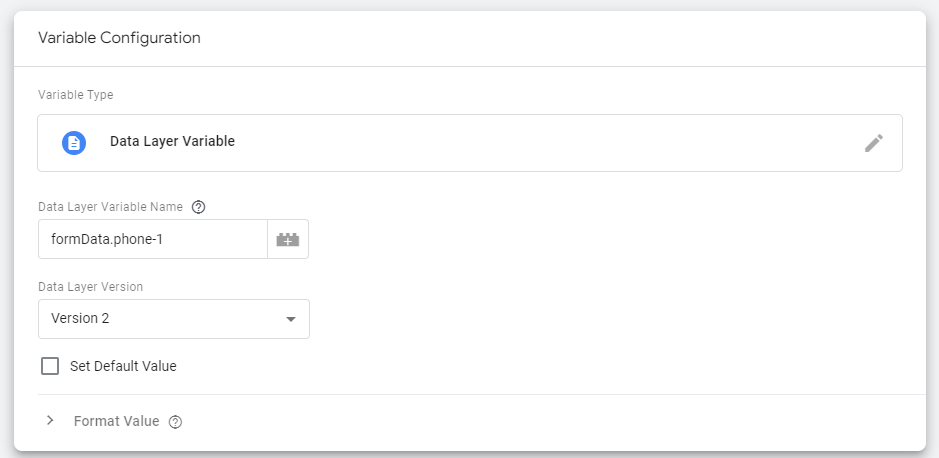
- Click on the Phone field, select New Variable
- Name the new variable “DLV – EC – Phone”
- Click on Variable Configuration, and select Data Layer Variable
- Under Data Layer Variable Name add formData.phone-1
%22%20transform%3D%22translate(1.8%201.8)%20scale(3.51563)%22%20fill%3D%22%23fff%22%20fill-opacity%3D%22.5%22%3E%3Cellipse%20cx%3D%22222%22%20cy%3D%2259%22%20rx%3D%221%22%20ry%3D%221%22%2F%3E%3Cpath%20d%3D%22M125%209h13v10h-13zm15%2075l13.5-1.4-31.2-15.3%2018.4%201.8zm4%2023l25%208-16-11z%22%2F%3E%3C%2Fg%3E%3C%2Fsvg%3E)
- Save everything.
Now for the testing. If you go to Tag Assistant, submit the form, and look at the AjaxComplete event, you should see the values populated under the Conversion Action, as well as under Variables.
Now, I only suggest you just create variables for the email and phone. Those are more than enough for Enhanced Conversions to work properly. If your form gathers more data, here are all the values from the Data Layer:
First Name: formData.name-1-first-name
Last Name: formData.name-1-last-name
Email: formData.email-1
Phone: formData.phone-1
Address: formData.address-1-street_address
City: formData.address-1-city
Region: formData.address-1-state
Country: formData.address-1-country
Postcode: formData.address-1-zip
Again, I only recommend using email and phone, or just email. Sending all this data is a privacy concern, and asking someone for all that data will greatly decrease the conversion rate.